
Oh, crisp air, cozy sweaters, and the irresistible scent of pumpkin spice – yes, fall is officially my favorite time of year! And you know what that means? It’s time to bake up something truly special, something that just screams autumn comfort. If you’ve got a sweet craving and are dreaming of that classic fall flavor, then you’ve landed in the right spot. These pumpkin scones are seriously my go-to when that craving hits. They’re wonderfully easy to whip up, absolutely bursting with all those warm, spiced autumn flavors we love, and just perfect for making your kitchen feel extra cozy. Trust me, I’ve spent years perfecting recipes that are both beautiful and a joy to make, and these scones are a shining example of that – pure, delicious fall magic right at your fingertips!

- Why You'll Love These Pumpkin Scones
- Gather Your Ingredients for Perfect Pumpkin Scones
- Step-by-Step Guide: How to Make Pumpkin Scones
- Tips for Baking the Best Pumpkin Scones
- Ingredient Notes and Substitutions for Pumpkin Scones
- Serving and Storing Your Delicious Pumpkin Scones
- Frequently Asked Questions About Pumpkin Scones
- Nutritional Information for Pumpkin Scones
- Share Your Pumpkin Scone Creations!
Why You’ll Love These Pumpkin Scones
Seriously, what’s not to adore about these pumpkin scones? They’re:
- Super Easy to Make: Like, seriously simple. You can whip these up without needing to be some kind of baking wizard. Perfect for a quick fall treat!
- Bursting with Fall Flavor: Packed with pumpkin, cinnamon, nutmeg, and ginger – it’s like autumn in every single bite. They satisfy that cozy craving like nothing else.
- A Perfect Homemade Dessert: Forget the bakery! Making these yourself brings that amazing, warm-from-the-oven goodness right to your table.
- Just the Right Amount of Sweet: They have that lovely sweetness that pairs perfectly with a cup of coffee or tea without being overwhelming.
Gather Your Ingredients for Perfect Pumpkin Scones
Alright, let’s get our mise en place ready for these absolutely delightful pumpkin scones! Having everything measured out beforehand really makes the baking process so much smoother and more enjoyable. Trust me, the difference between grabbing your ingredients and *really* getting them ready is huge. Here’s what you’ll need to create this little bites of autumn heaven:
You’ll want 2 cups of all-purpose flour, which is pretty standard for most baking. Then we’ve got 1/2 cup of granulated sugar for just the right amount of sweetness. For that lovely lift, grab 2 teaspoons of baking powder. Now for our cozy fall spice blend: 1/2 teaspoon of ground cinnamon, 1/4 teaspoon of ground nutmeg, and 1/4 teaspoon of ground ginger. Don’t forget 1/4 teaspoon of salt to balance all those flavors. The star binder? 1/2 cup (that’s one stick) of cold unsalted butter, cut into little cubes. Keeping that butter cold is a total game-changer for flaky scones! You’ll also need 1 cup of pumpkin puree – make sure it’s the pure pumpkin, not pumpkin pie filling! And for richness, 1 large egg. Add 1 teaspoon of vanilla extract for that classic warmth, and then 1/4 cup of heavy cream to bring it all together into a lovely dough. Oh, and for that gorgeous crunchy topping, you’ll want about 1/4 cup of turbinado sugar ready to sprinkle on top.
Step-by-Step Guide: How to Make Pumpkin Scones
Okay, now that we’ve got all our delicious ingredients prepped, let’s dive into making these amazing pumpkin scones! It’s a pretty straightforward process, and I promise, the result is totally worth it. Just follow these steps and you’ll have warm, spiced scones in no time. For even more fall goodness, you can check out my pumpkin scones with maple glaze recipe too!
Preparing Your Baking Station for Pumpkin Scones
First things first, let’s get our oven all fired up. We want it nice and hot at 400°F (200°C). While it’s heating, grab a baking sheet and line it with some parchment paper. This is my secret weapon for easy cleanup and making absolutely sure nothing sticks. It makes sliding those beautiful scones off so much simpler!
Mixing the Dry Ingredients for Your Pumpkin Scones
Grab your biggest mixing bowl. We’re going to combine all the dry goodies here. Toss in that all-purpose flour, the granulated sugar, baking powder, and all those lovely fall spices: cinnamon, nutmeg, and ginger. Don’t forget the salt! Give it all a really good whisk. This step is important because it makes sure everything – the leavening, the spices, the salt – is distributed evenly throughout the flour. That means every single bite of your scone will be perfectly seasoned!
Incorporating the Butter into the Dry Mix
Now for the butter! Remember how we cubed it while it was nice and cold? That’s key for flaky scones. Add those cold butter cubes into your flour mixture. You can use a pastry blender, a couple of forks, or even just your fingertips. What you’re aiming for is for the butter to break down into smaller pieces, coating the flour, until the whole thing looks like coarse crumbs. You might still see some pea-sized bits of butter, and that’s totally fine! Those little pockets of butter are what create those wonderful flaky layers when they bake.
Creating the Pumpkin Scone Dough
In a separate, smaller bowl, whisk together your pumpkin puree, the egg, and the vanilla extract until they’re nicely combined. Now, pour this pumpkin mixture right into the bowl with your flour and butter crumbs. Start mixing everything together gently. We don’t want to overwork it! Just mix until it’s *just* combined. Then, gradually add in that heavy cream, mixing until a soft dough starts to form. Remember, the less you handle this dough, the more tender your scones will be. Overmixing develops the gluten too much, and we want tender, not tough!
Shaping and Topping Your Pumpkin Scones
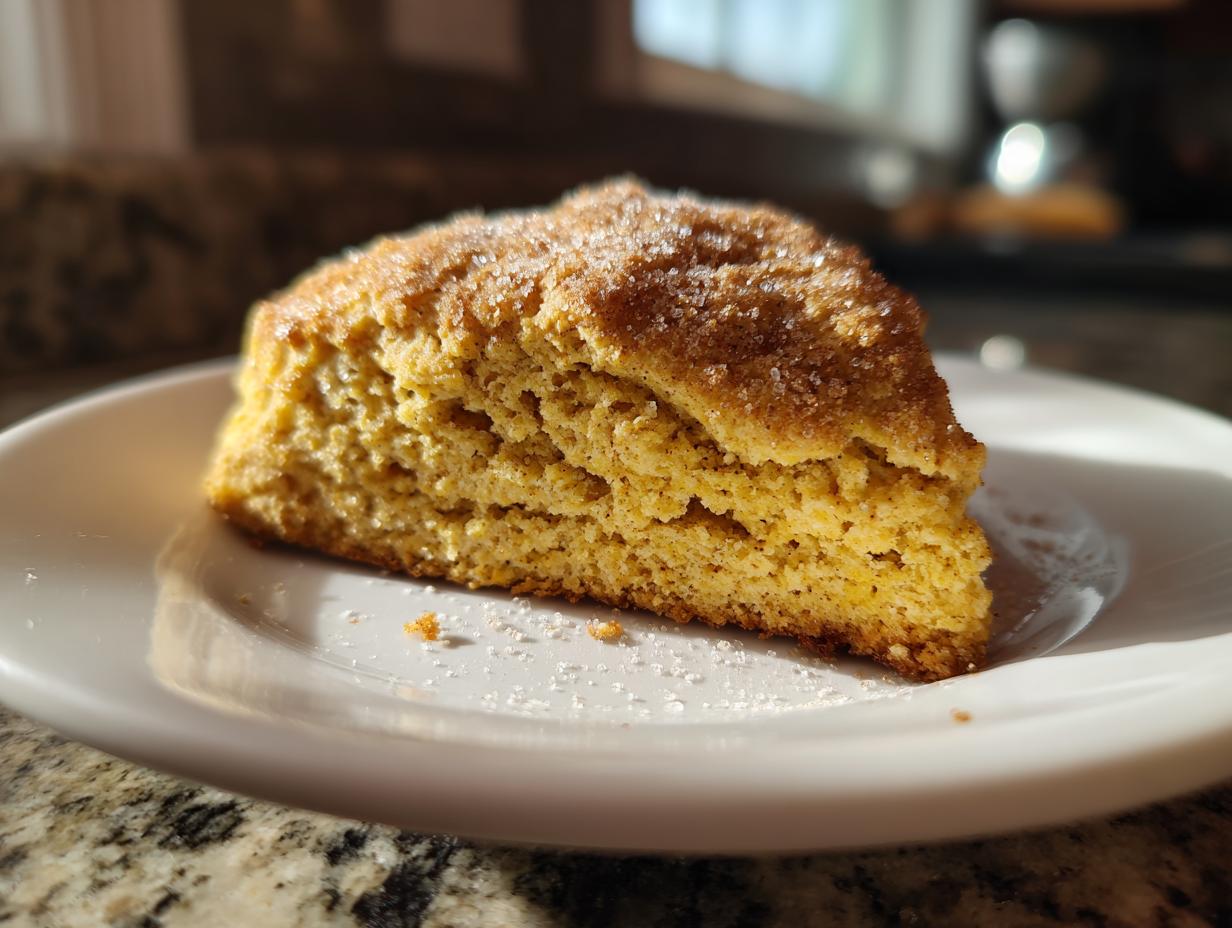
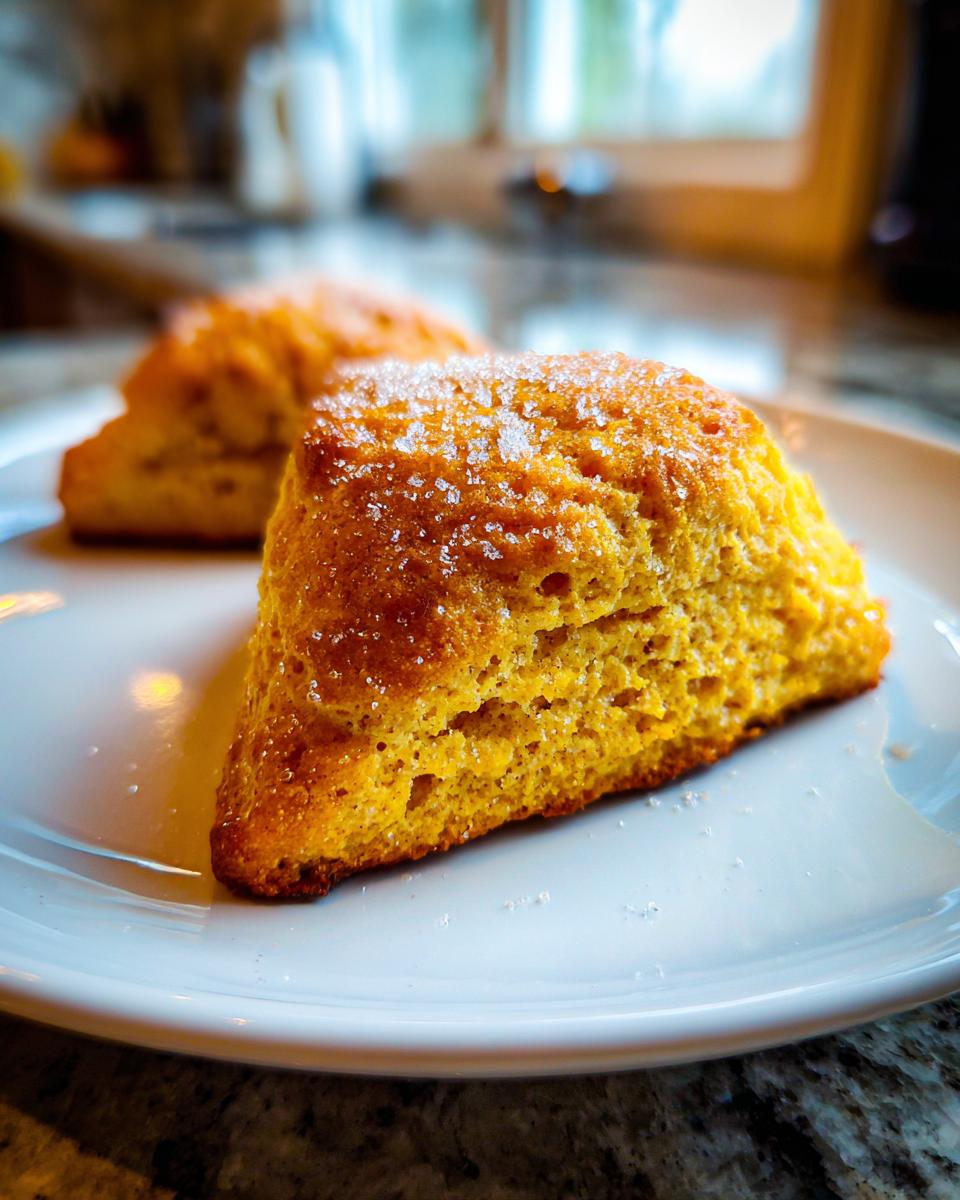
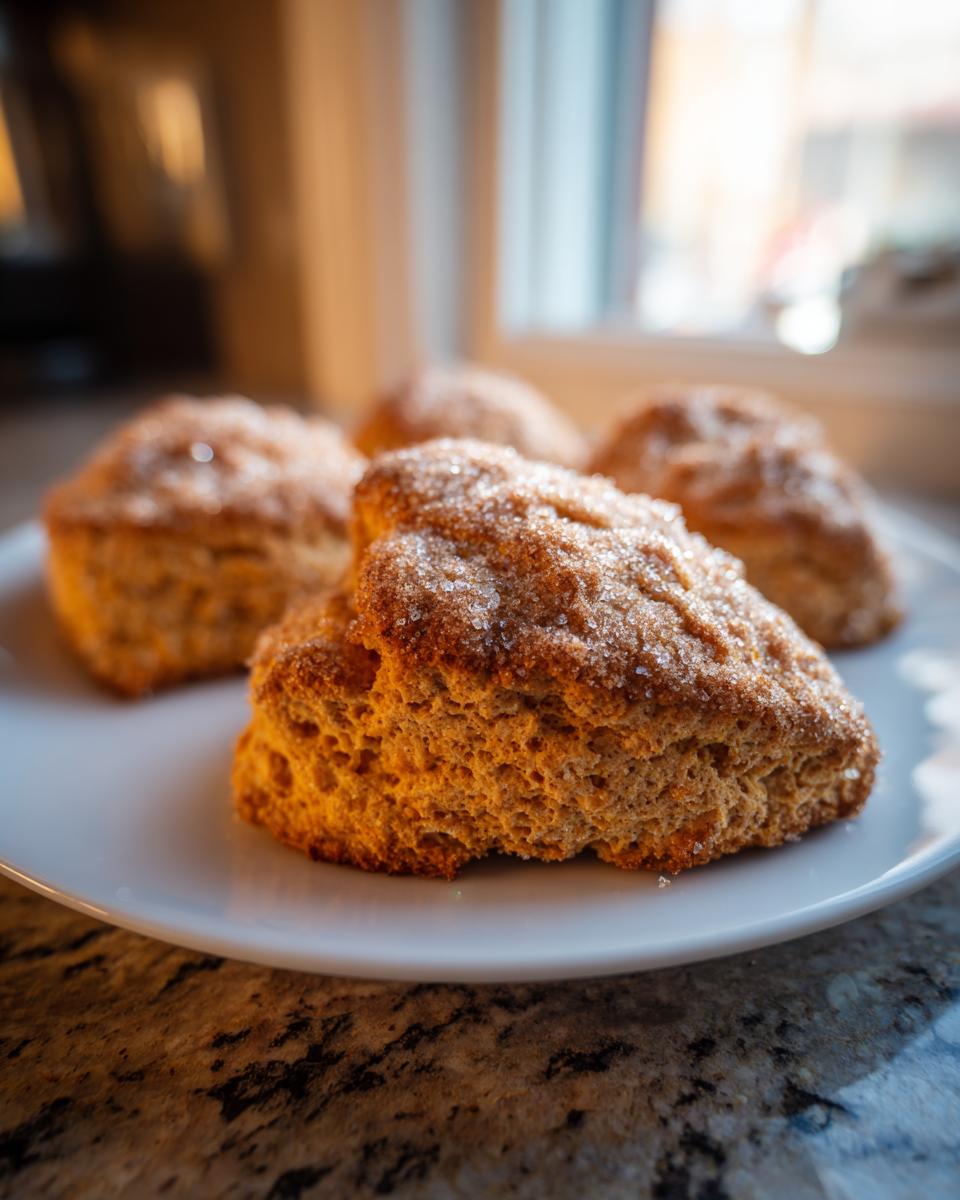
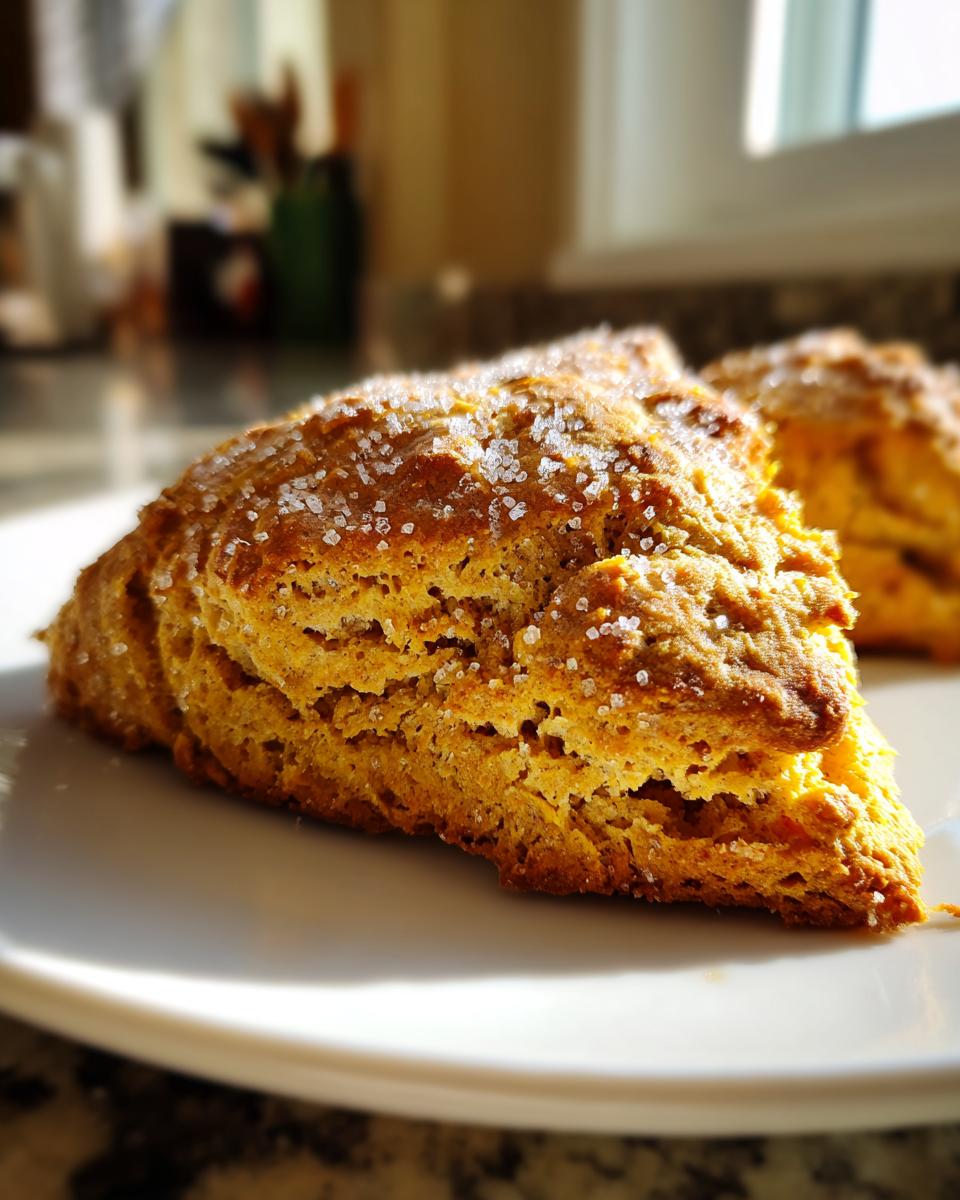
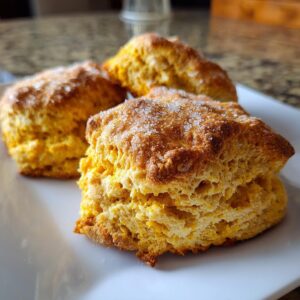
Turn that lovely, soft dough out onto a lightly floured surface. Gently, and I mean *gently*, pat it down into a round shape that’s about an inch thick. Think of it like patting down a pizza dough, but much softer. Once you have your round, use a sharp knife or a bench scraper to cut it into 8 wedges, like you’re slicing a pie. Carefully place these wedges onto your prepared baking sheet, giving them a little space so they can bake up nicely. Now for the best part – sprinkle the tops generously with that turbinado sugar. It gives them this gorgeous, crunchy sparkle and a little extra sweetness.
Baking and Cooling Your Perfect Pumpkin Scones
Pop that baking sheet into your preheated oven. They’ll need about 15 to 18 minutes. You’re looking for them to be beautifully golden brown on top and around the edges. To check if they’re done, you can insert a toothpick into the center of one – if it comes out clean, they’re ready! Once they’re out of the oven, let them cool on the baking sheet for just a few minutes. Then, carefully transfer them to a wire rack to cool completely. Patience here is key to letting them set up just right!
Tips for Baking the Best Pumpkin Scones
Okay, so you’ve got the recipe, you’ve got the ingredients laid out – now let’s talk about getting these pumpkin scones *perfect*. I’ve made a ton of these, and I’ve learned a few little tricks along the way that really make a difference. Think of these as my little secrets for getting that flaky, tender, perfectly spiced scone every single time. We want to avoid those dreaded scone pitfalls, you know? Nobody wants a tough or dry scone!
First off, let’s talk butter and temperature. Keeping your butter COLD is absolutely non-negotiable. I mean, ice cold! Cube it up, and if you’re in a warm kitchen, you can even pop it back in the fridge for a few minutes before you start. Those cold butter pieces are what create steam in the oven, giving you those gorgeous flaky layers. Speaking of which, when you’re mixing the dough, resist the urge to overmix! Seriously, just combine things until they *barely* come together. A little floury or lumpy is perfectly okay. Overworking the dough is the fastest way to a tough scone, and we definitely don’t want that. It’s like anything in baking, a little patience and gentle handling go a long way. If you love pumpkin goodies, you should also totally check out my pumpkin coffee cake or my cozy pumpkin bread pudding!
Ingredient Notes and Substitutions for Pumpkin Scones
Let’s chat about a few key ingredients in these pumpkin scones, because sometimes a little tweak can make all the difference, or you might just be curious about what makes them tick! First up, the pumpkin puree. Make sure you’re using 100% pure pumpkin puree, *not* pumpkin pie filling. Trust me, they look similar, but the pie filling has added sugar and spices that would totally mess up the flavor balance here. If you can’t find pure pumpkin, you *could* try butternut squash puree, but classic *pumpkin* is best for that authentic fall taste!
Now, about that heavy cream – it adds such richness! If you don’t have heavy cream on hand, you can usually get away with using half-and-half, though the scones might be a tad less tender. Some folks have even had success with whole milk, but you might need to add a touch more flour if the dough feels too wet. Just be gentle when mixing! And for the turbinado sugar on top? It gives that lovely crunch, but if you don’t have it, regular granulated sugar works too, or even a light dusting of powdered sugar after they cool if you’re feeling fancy.
Serving and Storing Your Delicious Pumpkin Scones
These pumpkin scones are honestly a dream served warm, just slightly cooled from the oven. They’re absolutely perfect with a steaming mug of coffee or a cozy pumpkin spice latte. If you want to take them up a notch, a little drizzle of cream cheese frosting or a simple glaze made from powdered sugar and a splash of milk is divine! You could even try a copycat pumpkin spice latte to go with them. But honestly, I think they’re best enjoyed just as they are, maybe with a little pat of butter. As for leftovers, they keep pretty well! Store them in an airtight container at room temperature for up to 2 days. Though, if I’m being honest, they rarely last that long in my house!
Frequently Asked Questions About Pumpkin Scones
Got questions about whipping up these delightful pumpkin scones? I totally get it! Baking can sometimes feel like a bit of an art, and there are a few things that always come up. Let’s clear them up so you can bake the best, most flavor-packed fall treats!
Can I make these pumpkin scones ahead of time?
You know, these homemade desserts are most special when they’re fresh out of the oven, but you can totally prep the dough a day in advance! Just mix everything up, shape the dough, cut the wedges, and then wrap them snugly in plastic wrap and pop them in the fridge. When you’re ready to bake, just lay them out on the parchment-lined baking sheet, give them a sprinkle of that sugary crunch, and bake as usual, maybe adding a minute or two to the baking time since they’ll be starting cold. They are *best* enjoyed the day they’re baked, though, so definitely try to get them in the oven relatively soon!
What kind of pumpkin puree should I use for pumpkin scones?
This is a super important one! You absolutely want to use 100% PURE pumpkin puree. Seriously, check the can – it should just say “pumpkin” or “pumpkin puree.” Do NOT grab the pumpkin pie filling. That stuff already has sugar, spices, and other things added, which will totally change the flavor and texture of your scones. We want to control the spice and sweetness ourselves! If you can’t find pure pumpkin, pureed butternut squash is a pretty decent substitute, though you’ll still want to bake them fresh.
How do I get my pumpkin scones to be fluffy and tender?
Ah, the quest for the perfect scone texture! The absolute biggest key is not to overmix! Once you add the wet ingredients and the cream, just mix until it *barely* comes together. Seriously, you want it to be a soft, slightly shaggy dough. Overmixing activates too much gluten, and that’s what makes scones tough instead of tender and crumbly. Also, keeping that butter super cold and cutting it in properly is a huge part of creating those lovely, flaky layers. Don’t be afraid to leave some little bits of butter in there!
Can I add anything to the pumpkin scone dough?
Oh, absolutely! I love experimenting with adding little bits of extra flavor. Some chopped pecans or walnuts are fantastic in these – just toss about half a cup in with the dry ingredients. You could even add some dried cranberries for a bit of tartness, or a handful of chocolate chips if you’re feeling indulgent! And if you’re looking for more fall recipe ideas, you might enjoy my pumpkin waffles or my easy pumpkin overnight oats too!
Nutritional Information for Pumpkin Scones
Just a little heads-up about the nutrition here! These numbers are estimates, of course, because every kitchen and ingredient can vary a bit. But generally, one of these delicious pumpkin scones comes in at around 350 calories, with about 18g of fat (that’s roughly 11g saturated fat, thanks to that lovely butter!). You’re looking at about 45g of carbohydrates and roughly 4g of protein per scone. It’s a sweet, satisfying fall treat, and that’s what really matters, right?
Share Your Pumpkin Scone Creations!
I absolutely adore hearing from you all! When you make these pumpkin scones, please tell me about it! Did you try any fun additions? How did they turn out? Leave a comment below and let me know what Catherine (that’s me!) would think of your beautiful bakes – you can even see how I got started on my About page! Seeing your creations makes my whole day, and I love sharing them on my blog too!
PrintPumpkin Scones
Enjoy these easy pumpkin scones, a perfect fall dessert that satisfies your sweet cravings with classic autumn flavors.
- Prep Time: 20 min
- Cook Time: 18 min
- Total Time: 38 min
- Yield: 8 scones 1x
- Category: Dessert
- Method: Baking
- Cuisine: American
- Diet: Vegetarian
Ingredients
- 2 cups all-purpose flour
- 1/2 cup granulated sugar
- 2 teaspoons baking powder
- 1/2 teaspoon ground cinnamon
- 1/4 teaspoon ground nutmeg
- 1/4 teaspoon ground ginger
- 1/4 teaspoon salt
- 1/2 cup (1 stick) cold unsalted butter, cut into cubes
- 1 cup pumpkin puree
- 1 large egg
- 1 teaspoon vanilla extract
- 1/4 cup heavy cream
- 1/4 cup turbinado sugar, for sprinkling
Instructions
- Preheat your oven to 400°F (200°C). Line a baking sheet with parchment paper.
- In a large bowl, whisk together the flour, granulated sugar, baking powder, cinnamon, nutmeg, ginger, and salt.
- Cut in the cold butter using a pastry blender or your fingertips until the mixture resembles coarse crumbs.
- In a separate bowl, whisk together the pumpkin puree, egg, and vanilla extract.
- Add the pumpkin mixture to the dry ingredients and mix until just combined.
- Gradually add the heavy cream, mixing until a soft dough forms. Do not overmix.
- Turn the dough out onto a lightly floured surface. Gently pat the dough into a 1-inch thick round.
- Cut the round into 8 wedges.
- Place the wedges on the prepared baking sheet.
- Sprinkle the tops with turbinado sugar.
- Bake for 15-18 minutes, or until golden brown and a toothpick inserted into the center comes out clean.
- Let cool on the baking sheet for a few minutes before transferring to a wire rack to cool completely.
Notes
- For an extra fall flavor, you can add 1/2 cup of chopped pecans or walnuts to the dough.
- Serve with a drizzle of cream cheese frosting or a simple glaze made from powdered sugar and milk.
- These scones are best enjoyed the day they are made, but can be stored in an airtight container at room temperature for up to 2 days.
Nutrition
- Serving Size: 1 scone
- Calories: 350
- Sugar: 20g
- Sodium: 200mg
- Fat: 18g
- Saturated Fat: 11g
- Unsaturated Fat: 7g
- Trans Fat: 0g
- Carbohydrates: 45g
- Fiber: 2g
- Protein: 4g
- Cholesterol: 60mg