

There is just something about the shift to cooler weather that makes me crave food that tastes like comfort and home, isn’t there? For me, that always means seasonal vegetables taking center stage. I want them simple, flavorful, and able to work seamlessly whether I’m whipping up a quick weeknight meal or building out a big holiday menu. That’s why I am so excited to finally share my definitive guide for achieving perfectly roasted butternut squash—that magical combination of deeply caramelized, crispy edges giving way to a sweet, unbelievably creamy interior.
After years in professional kitchens and endless attempts at home, I figured out the trick to making this the ultimate easy roasted butternut squash recipe. This formula relies on approachable elegance; you get gourmet results without any fussy steps. Trust me, once you follow this technique, you won’t look back. And speaking of seasonal flavors, you should absolutely check out my Fall Harvest Salad once you’ve got that gorgeous squash roasted!
- Why This is the Ultimate Easy Roasted Butternut Squash Recipe
- Ingredients for Perfect Roasted Butternut Squash
- How to Roast Butternut Squash Perfectly: Step-by-Step
- Tips for Achieving Caramelized Butternut Squash Edges
- Simple Roasted Butternut Squash Flavor Variations
- Serving Suggestions for Your Roasted Butternut Squash
- Storage and Reheating Instructions for Roasted Butternut Squash
- Frequently Asked Questions About Roasted Butternut Squash
- What to Make Next: More Easy Oven Roasted Vegetables
Why This is the Ultimate Easy Roasted Butternut Squash Recipe
I know you have a dozen recipes for this already, but this one truly stands apart. When I developed this method, I focused only on the things that matter most to you—flavor, texture, and speed. It’s designed to deliver restaurant-quality results without making you feel like you need a culinary degree.
Here is exactly why you need to bookmark this method for roasted butternut squash:
- Texture Guarantee: Every cube achieves those deeply satisfying, caramelized, crispy edges while staying wonderfully creamy inside. No mush allowed!
- Weeknight Friendly: At just 15 minutes of prep and 30 minutes in the oven, this is one of the fastest quick vegetable side dishes out there.
- Total Versatility: It steps up beautifully as a simple weeknight side, but it’s sturdy enough to anchor your whole holiday squash side spread.
- Simple Ingredients: We rely on pantry staples, meaning you don’t have to rush to the store for fancy items. Pure flavor, simple execution.
Ingredients for Perfect Roasted Butternut Squash
I like to keep the ingredient list tight for this recipe. We’re letting the natural flavor of the squash shine through, balanced only by good oil and a few key seasonings. If you want the full seasoning breakdown, I have a separate piece on simple squash seasonings, but for the basic, perfect roast, here is what you’ll need.
- 2 medium butternut squash (aim for about 3 lbs total, peeled and cubed)
- 3 tablespoons good quality olive oil
- 1 teaspoon kosher salt (don’t skimp here!)
- 1/2 teaspoon black pepper
- 1/2 teaspoon garlic powder
- 1/4 teaspoon ground cinnamon (this is optional, but I adore the subtle sweetness it brings!)
That’s it! See? So simple. Uniformly sized, 1-inch cubes are the secret weapon here for ensuring that lovely, even caramelization.
How to Roast Butternut Squash Perfectly: Step-by-Step
This is where the magic happens, and honestly, it’s so straightforward—I almost feel like I’m cheating! Getting that amazing texture for your roasted butternut squash is entirely dependent on two things: uniform size and giving the cubes space on the pan. We’re roasting, not steaming, so we need that hot air to circulate around every single piece. Remember, my goal is always Approaching Elegance, so clean technique is key here!
First things first: Get that oven scorching hot at 400°F. I always line my baking sheet with parchment paper because cleaning up caramelized squash sugar is *not* my idea of fun on a weeknight. Then, let’s tackle the physical part.
Prepping and Seasoning your Roasted Butternut Squash
Peeling is the trickiest bit, but slice the squash in half lengthwise first, scoop out those messy seeds, and then peeling becomes simple with a good vegetable peeler. We need those 1-inch cubes to be as close to the same size as possible—this is essential for even cooking. Once cubed, toss them generously with the olive oil right in a big bowl. Next, mix in the salt, pepper, garlic powder, and cinnamon if you’re using it. You want every surface lightly coated to capture that perfect sweet and savory balance.
Baking for Caramelized Butternut Squash
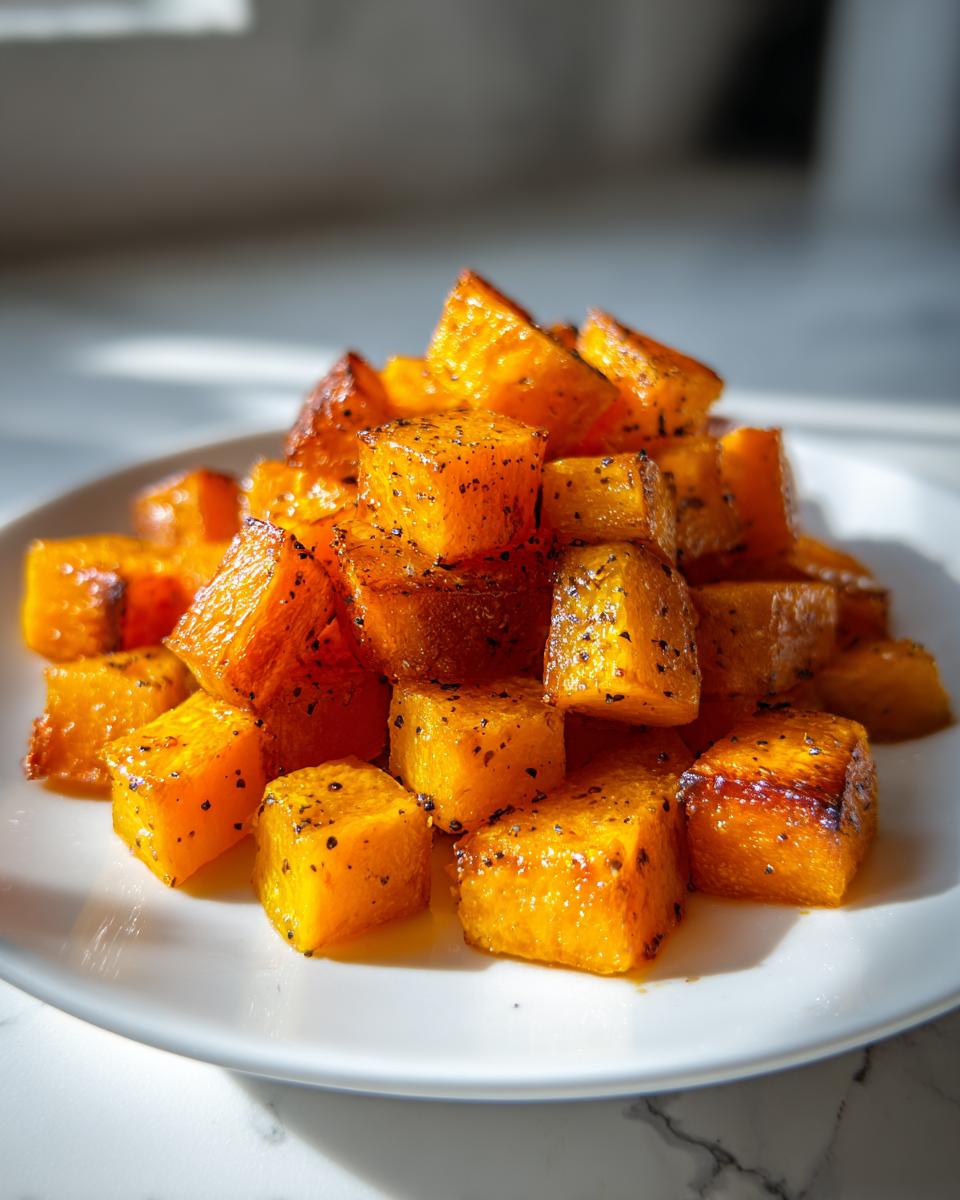
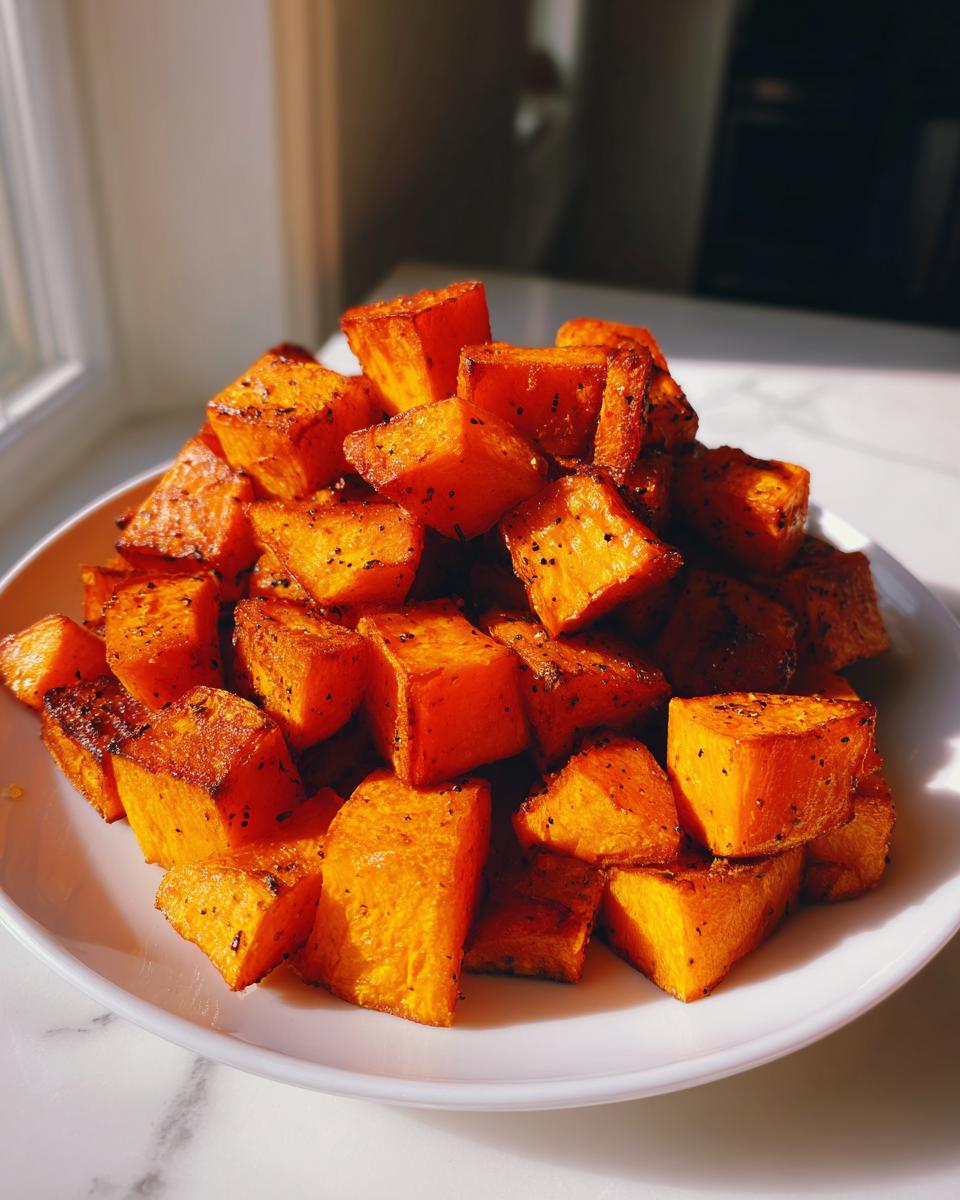
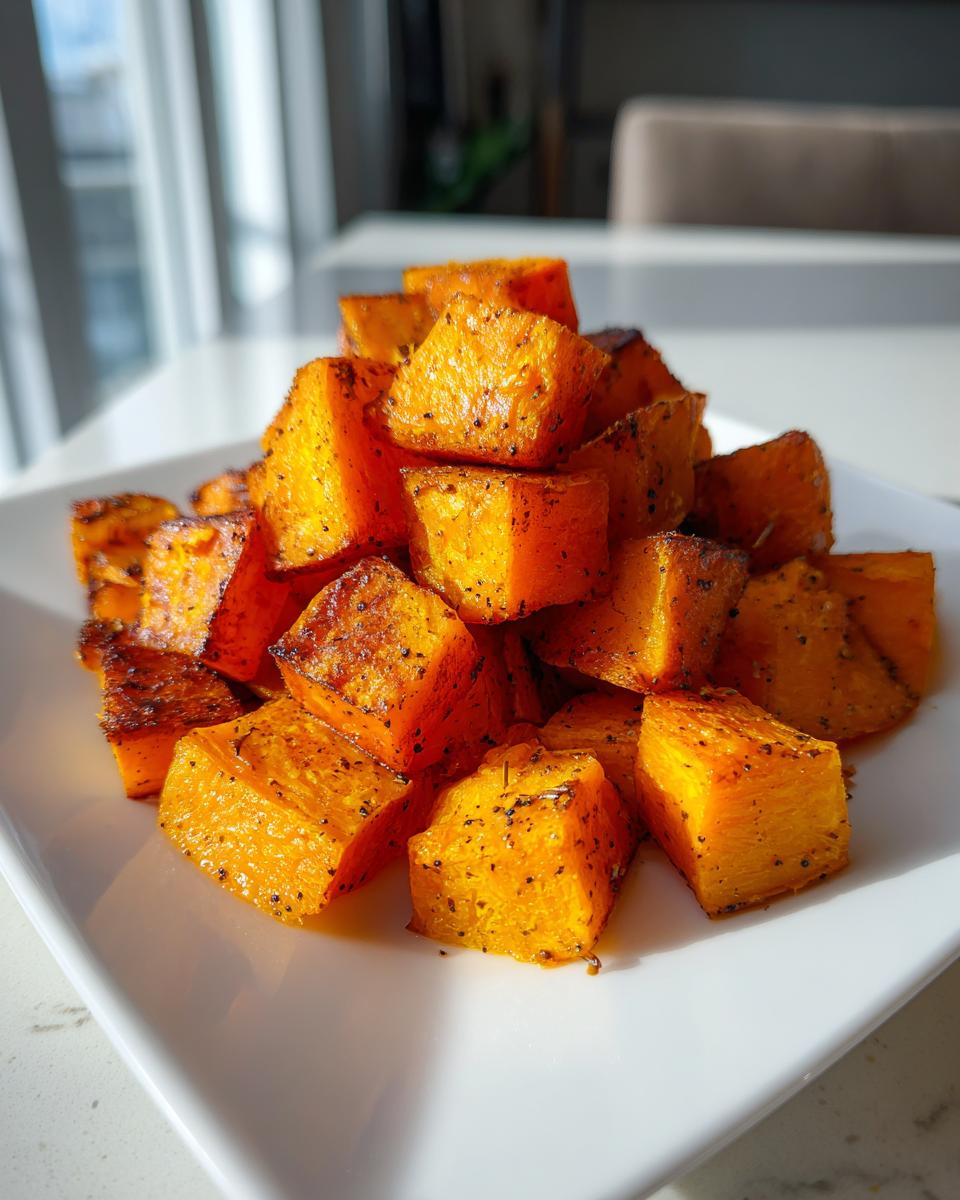
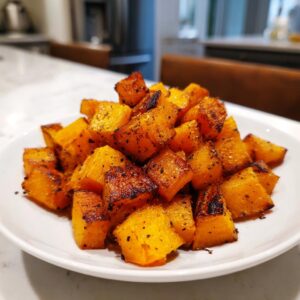
Spread those seasoned cubes onto your prepared baking sheet. And please, listen to me here: Do not overcrowd the pan! If the pieces are touching too much, they will steam, and you’ll end up with soft, pale vegetables instead of gorgeous caramelized butternut squash. Use two pans if you have to! Bake them for 25 to 35 minutes total. Around the 15-minute mark, take them out and flip every cube. They’re done when they are totally fork-tender and the edges look dark, almost blackened in spots. That color means flavor, my friends!
Tips for Achieving Caramelized Butternut Squash Edges
Okay, you’ve got your cubes in the oven, but how do we push them from merely *roasted* to absolutely *ethereal*? The key to that perfect caramelization on your roasted butternut squash cubes is high heat and very little moisture. The goal is to roast them fast enough that the edges crisp up before the center turns to mush.
If you want to really lean into the sweetness—and I highly recommend this step, especially if you are serving this for a holiday squash side—try adding a little liquid sweetener. Right when you toss the squash with the oil and spices, add just 1 tablespoon of maple syrup. It toasts beautifully under the high heat, creating those gorgeous, deeply browned patches on your caramelized butternut squash. Also, a non-negotiable rule for perfect oven baked squash cubes: never, ever skip flipping them halfway through. That ensures every side gets direct contact with that hot sheet pan!
Simple Roasted Butternut Squash Flavor Variations
While my base recipe for roasted butternut squash uses a hint of cinnamon for that lovely sweet and savory squash profile, sometimes I want a completely different direction! The beauty of roasting vegetables this way is that the base technique stays the same, but the spice blend opens up a whole new world of flavor. You can pivot in seconds for a completely new side dish.
If you’re tired of the sweet route, let’s go deeply savory. Skip the cinnamon entirely and go straight for Mediterranean herbs. Try adding 1 teaspoon of dried rosemary and thyme to the oil mix—it smells incredible in the oven! Or, for something with a little kick, throw in 1/2 teaspoon of smoked paprika and a pinch of cayenne pepper. That creates a stunning, slightly spicy take on roasted butternut squash that pairs perfectly with chicken.
For a bright, zesty change, consider adding a teaspoon of dried oregano and a bit of lemon zest right after they come out of the oven. These little tweaks show how one simple base can handle so many flavor profiles. If you love savory herby flavors, you absolutely must try my recipe for garlic and herb stuffed mushrooms next!
Serving Suggestions for Your Roasted Butternut Squash
Now that you have this perfect batch of roasted butternut squash, where should it go? Don’t just use it as a backup side dish! This caramelized vegetable deserves to be front and center sometimes. It’s sturdy enough to travel well, making it an ideal Thanksgiving side dish vegetables option when you need to prep ahead.

For a main course transformation, toss these warm cubes into a hearty grain bowl alongside farro or quinoa, crumbled feta, and a drizzle of balsamic glaze. They are also fantastic mixed into roasted chicken or pork chop plates for quick butternut squash for dinner ideas. Honestly, these crispy cubes make almost anything feel like a seasonal celebration!
Storage and Reheating Instructions for Roasted Butternut Squash
This recipe is excellent for meal prep, which takes the pressure off busy weeknights! When you have leftovers of your perfectly seasoned roasted butternut squash, you need to treat them right so they don’t lose that beautiful texture we worked so hard to achieve.
Store the cooled squash in an airtight container in the refrigerator. It keeps beautifully for about four days. If you planned ahead for a holiday meal, this reheats wonderfully, too. I suggest avoiding the microwave if you can. Microwaving tends to bring back some steam, turning those crispy edges soft.
Instead, reheat the cubes on a baking sheet at 350°F for about 8 to 10 minutes. This brings back some of that dry heat, crisping up the exterior just a little bit again. Easy peasy, and they taste almost freshly roasted!
Frequently Asked Questions About Roasted Butternut Squash
I always get a ton of questions when I post about this dish—it seems everyone struggles with getting that perfect texture! I’ve pulled together the most common ones right here to make sure your next batch of roasted butternut squash is flawless.
Is it hard to peel butternut squash for roasting?
That’s the million-dollar question! I won’t lie, the skin is tough, which is why it’s one of the most common anxieties when preparing this dish. The absolute best technique, which I use in the recipe above, is to slice the squash in half lengthwise first. Once you scoop the seeds out, the skin becomes much easier to tackle with a sturdy vegetable peeler. If you try peeling it whole, you often end up fighting the shape—a recipe for a slip and a cut finger! Go slow, use a solid peeler, and you’ll be fine. Remember, even if you mess up a little, once they are cut into those 1-inch cubes, baking at 400 degrees covers a lot of minor sins!
Can I use maple syrup when making roasted butternut squash?
Oh, yes, you absolutely can! If you are hunting for that deep, sticky-sweet flavor that borders on dessert, maple syrup is your friend. As I mentioned in the tips section, adding a tablespoon of maple syrup right along with the olive oil when you seasoning your cubes helps everything caramelize beautifully, giving you that ultra-flavorful caramelized butternut squash. It locks in moisture too, which prevents drying out. Just be warned: if you add syrup, keep a closer eye on the oven to make sure those little edges don’t burn before the inside gets tender!
What to Make Next: More Easy Oven Roasted Vegetables
I hope this recipe has given you the confidence to master roasted butternut squash! But let’s not stop there. Once you understand the high-heat roasting technique, it opens up so many avenues for simple, elegant sides. If you loved this, you have to try my method for crispy oven roasted breakfast potatoes next time you’re looking for satisfying easy oven roasted vegetables. Happy cooking, my friends!
PrintThe Ultimate Easy Roasted Butternut Squash: Crispy Edges and Creamy Inside
This simple recipe delivers perfectly roasted butternut squash every time, featuring caramelized, crisp edges and a tender, creamy interior. It is an approachable, healthy side dish ideal for weeknight dinners or holiday spreads.
- Prep Time: 15 min
- Cook Time: 30 min
- Total Time: 45 min
- Yield: 6 servings 1x
- Category: Side Dish
- Method: Baking
- Cuisine: American
- Diet: Vegetarian
Ingredients
- 2 medium butternut squash (about 3 lbs total)
- 3 tablespoons olive oil
- 1 teaspoon kosher salt
- 1/2 teaspoon black pepper
- 1/2 teaspoon garlic powder
- 1/4 teaspoon ground cinnamon (optional, for sweetness)
Instructions
- Preheat your oven to 400 degrees Fahrenheit (200 degrees Celsius). Line a large baking sheet with parchment paper for easy cleanup.
- Prepare the squash: Carefully peel the butternut squash. Slice it in half lengthwise. Use a spoon to scoop out and discard the seeds and stringy pulp.
- Cut the squash into uniform 1-inch cubes. Uniform size helps the squash cook evenly, ensuring crispy edges and a creamy inside.
- In a large bowl, toss the squash cubes with the olive oil until they are evenly coated.
- Add the kosher salt, black pepper, garlic powder, and cinnamon (if using) to the bowl. Toss again until the seasonings adhere to the squash.
- Spread the seasoned squash onto the prepared baking sheet in a single layer. Do not overcrowd the pan; use two sheets if necessary. Crowding steams the vegetables instead of roasting them.
- Roast for 25 to 35 minutes. Halfway through the cooking time (around 15 minutes), use a spatula to flip the cubes so they brown evenly on all sides.
- The squash is done when it is fork-tender and the edges show deep golden-brown caramelization.
- Serve immediately as a healthy roasted vegetable side dish or incorporate it into your favorite fall vegetable recipes.
Notes
- For extra caramelization, you can toss the squash with 1 tablespoon of maple syrup along with the oil and spices before roasting.
- If you are making this for a holiday squash side, you can roast it ahead of time and reheat it in a 350 degree oven for 10 minutes before serving.
- This simple squash seasoning works well with sweet potato as well; try making a mixed tray of oven baked squash cubes.
Nutrition
- Serving Size: 1 cup cooked
- Calories: 180
- Sugar: 8
- Sodium: 350
- Fat: 7
- Saturated Fat: 1
- Unsaturated Fat: 6
- Trans Fat: 0
- Carbohydrates: 29
- Fiber: 6
- Protein: 3
- Cholesterol: 0