

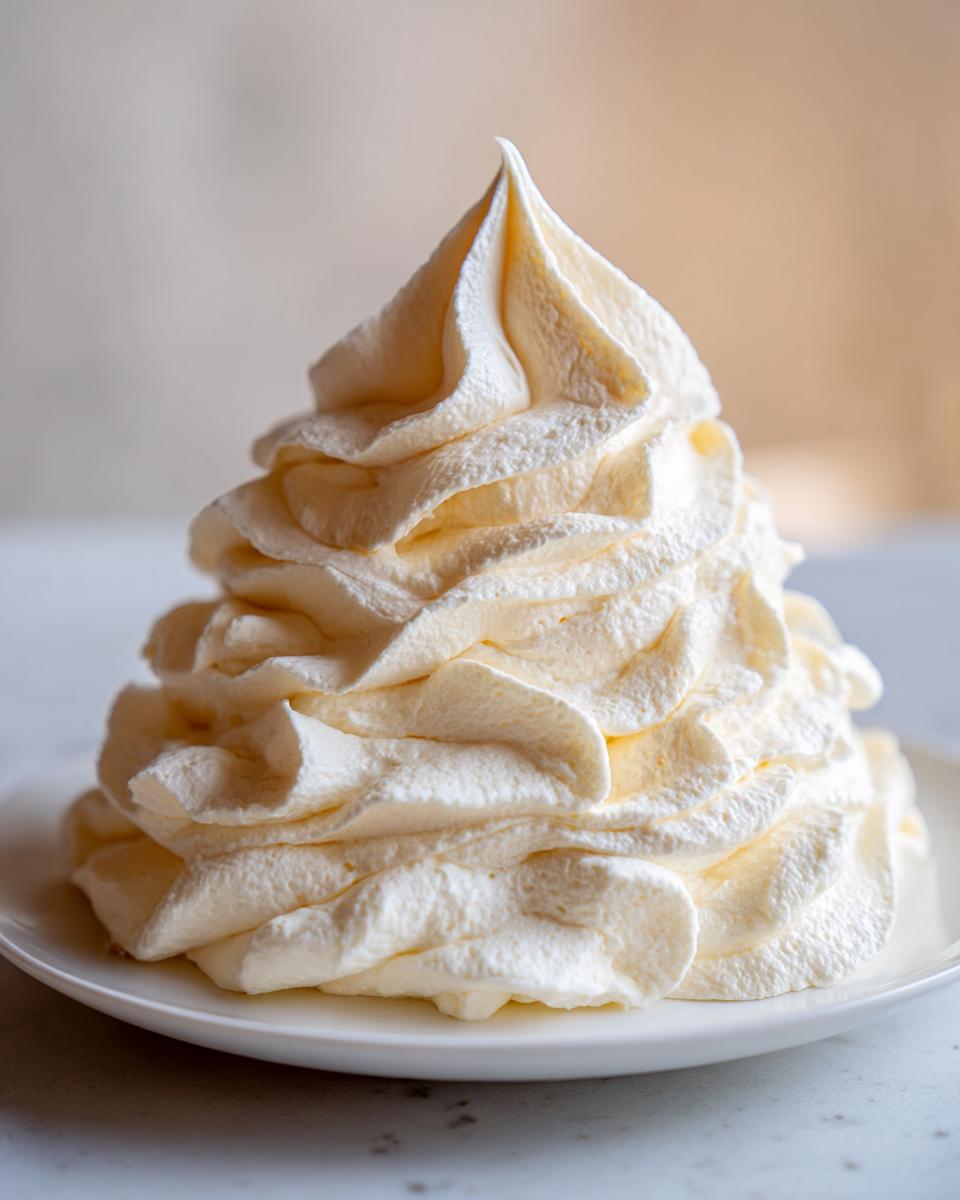
I truly believe that a beautiful cake or a perfectly decorated cookie hinges entirely on that final touch: the frosting. It’s not just decoration; it’s the component that carries the whole dessert experience. I learned in culinary school that mastering the basics unlocks so much potential, and that’s why I’m so excited to share what I consider the absolute best, most reliable foundation: my ultimate **vanilla buttercream**. Forget those fussy, temperamental frostings—this American version is rich, unbelievably fluffy, and stable enough to hold up to any piping design you dream up. It’s designed for the home cook who wants bakery-style results without the stress, and trust me, this is the only **creamy vanilla icing** recipe you’ll ever need.
- Why This Ultimate Fluffy Vanilla Buttercream is Your New Go-To Frosting
- Gathering Ingredients for Perfect Vanilla Buttercream
- Mastering the American Buttercream Frosting Tutorial Steps
- Pro Tips for the Best Vanilla Buttercream Recipe
- Making Your Vanilla Buttercream Versatile: Ingredient Notes/Substitutions
- Storage and Reheating Instructions for Your Vanilla Buttercream
- Troubleshooting Common Issues with Easy Homemade Frosting
- Serving Suggestions: Pairing Your Bakery Style Buttercream
- Estimated Nutritional Data for Vanilla Buttercream
Why This Ultimate Fluffy Vanilla Buttercream is Your New Go-To Frosting
After years spent refining recipes, I can tell you exactly what sets a good frosting apart from the best vanilla buttercream recipe out there. This formula strikes that perfect, elusive balance we all chase in the kitchen.
It’s engineered for success, which means less worry for you and more time enjoying your creations. Here are the main reasons I rely on this blend every single time I frost a cake:
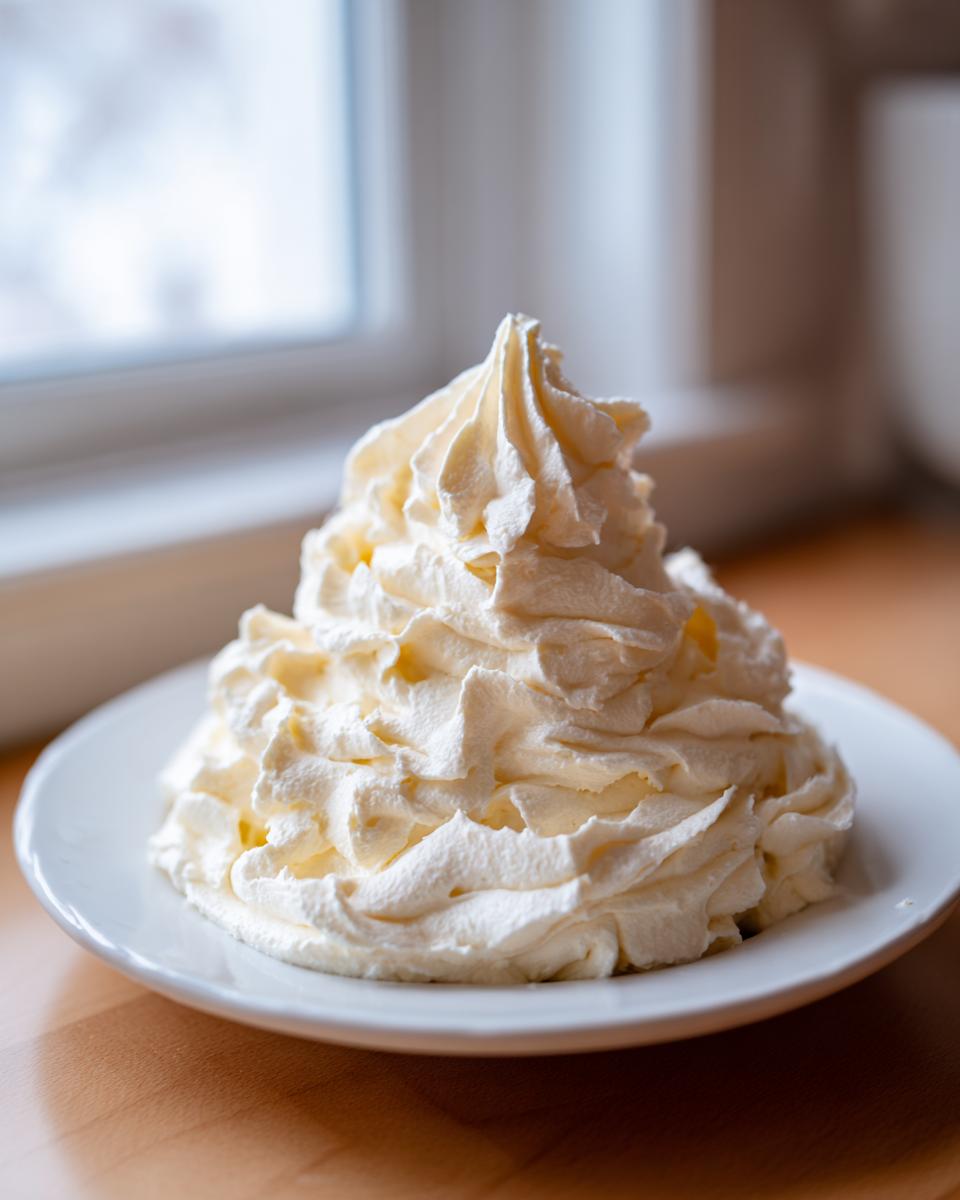
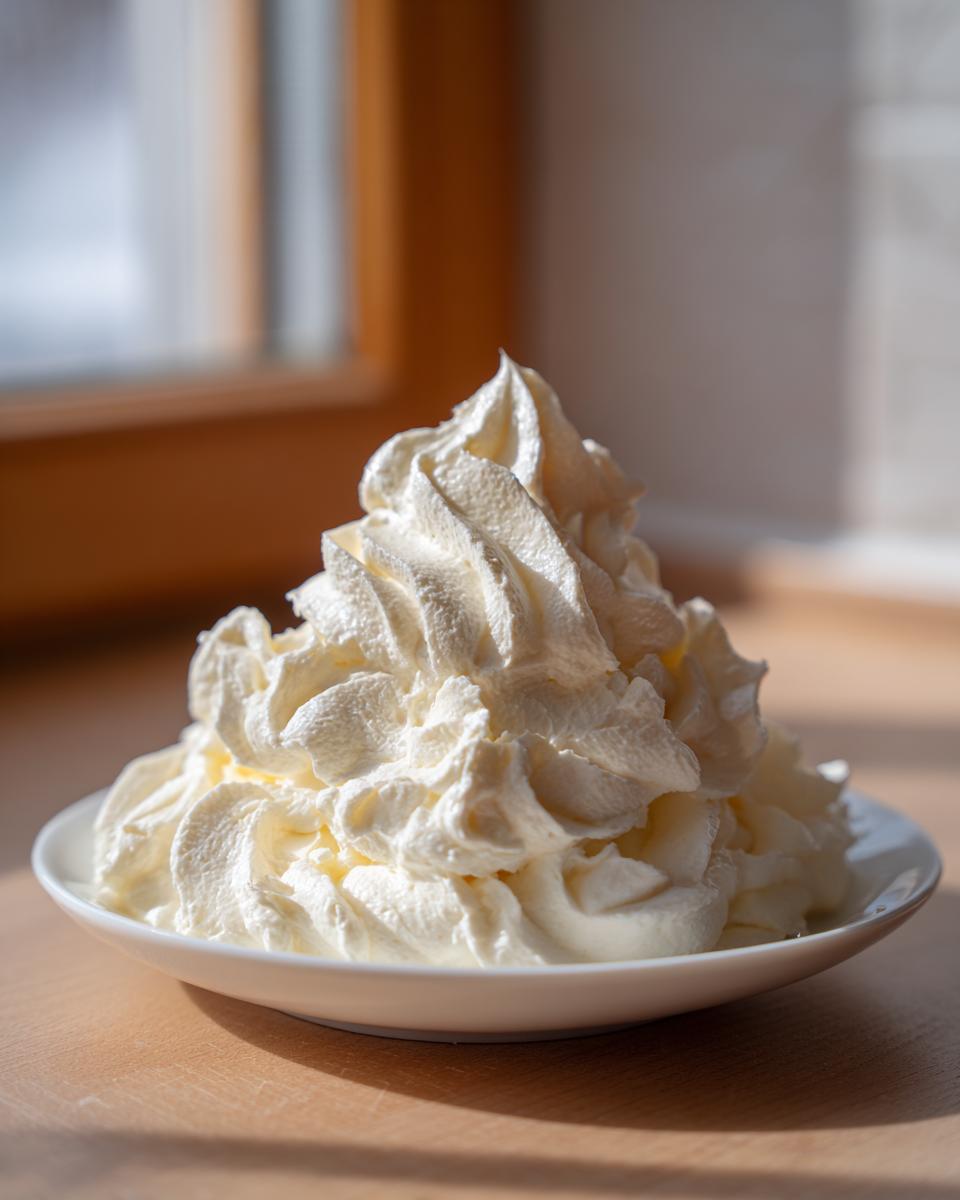
- Unbelievably Fluffy Texture: We rely on aggressive whipping time to incorporate loads of air, making it light and cloud-like—not the heavy, overly sweet icing you sometimes get.
- Piping Stability: This is a genuinely stable frosting recipe. If you want sharp edges or intricate swirls for your next batch of cupcakes, this holds its shape beautifully, even if your kitchen runs a little warm.
- Simple, Flavor-Forward: It uses basic pantry staples, but because we use pure vanilla, the flavor shines through richly without being masked by other components.
Whether you’re decorating my easy-to-make cookies or finally tackling that layer cake, this frosting delivers that beautiful, bakery style buttercream look and taste. You can even use it as a quick topping for holiday sugar cookies!

Gathering Ingredients for Perfect Vanilla Buttercream
When you’re aiming for that ultimate fluffy texture, every single ingredient needs to be treated with respect. I always tell people that the quality of your butter and vanilla makes the difference between a good frosting and the best vanilla buttercream recipe, period. Because this is an American buttercream, we rely on the power of simple fats and sugars, so using high-quality pure vanilla extract is crucial for that rich depth of flavor in your final creamy vanilla icing.
Essential Components for Your Creamy Vanilla Icing
Here is precisely what you need to pull together this fuss-free topping. I highly recommend measuring everything out before you touch that mixer—it helps keep the process smooth, especially since this whole thing comes together in minutes!
- 1 cup unsalted butter, softened to room temperature
- 4 cups powdered sugar, sifted
- 1 tablespoon pure vanilla extract
- 3-4 tablespoons heavy cream or milk
- Pinch of salt
Make sure that butter is soft! I can’t stress that enough. If it’s cold, you get lumps; if it’s oily and warm, your stability flies right out the window.
Mastering the American Buttercream Frosting Tutorial Steps
Okay, now for the fun part! This is where we turn simple ingredients into magic. What I love most about this vanilla buttercream is that it’s practically impossible to mess up, especially when you follow these few key texture checkpoints. We are aiming for that gorgeous, airy feel that you see in all the beautiful cake photos online, all ready to go in about 10 minutes total. Keeping the equipment moving quickly is the secret to making smooth buttercream.
Step 1: Creaming the Butter for Fluffy Buttercream for Cakes
First thing you absolutely must do is beat that softened butter until it’s humming along perfectly on its own. I mean it! You want it completely smooth and creamy, about 2 minutes of solid running time on medium speed. If you see any little hard bits of butter left when you scrape the bowl down, keep going. This initial step is what creates those tiny air pockets that give us that desirable fluffy texture later on.
Step 2: Incorporating Sugar and Flavor for Classic Vanilla Icing
Next, turn your mixer down low—this is important!—and start teasing in the sifted powdered sugar, just one cup at a time. Don’t rush this! If you dump it all in at once, you’ll end up wearing half your easy homemade frosting, and trust me, cleaning dried sugar off the ceiling isn’t fun. Once all the sugar is in, add your pinch of salt and that splash of pure vanilla extract. Now, crank the speed up and let it whip for three full minutes until the color lightens.
Step 3: Achieving the Right Consistency for Buttercream for Piping Designs
This is where you customize the texture! Slowly add your heavy cream or milk, tablespoon by tablespoon. If you plan on making those elaborate swirls for your next dessert, be conservative—use just 3 tablespoons and see how it feels. If you need something softer, like for spreading easily across a cake, add that fourth tablespoon. Once you hit your consistency goal, let the mixer run on medium-high for another three to five minutes. This final, long whip is the key to that signature, no-fail vanilla frosting that holds its shape like a dream. Knowing how to get that stiff frosting for decorating means you can trust it on everything, even when you are looking for iced cookies!
Pro Tips for the Best Vanilla Buttercream Recipe
Honestly, achieving the best vanilla buttercream recipe comes down to finishing touches and paying close attention to temperature. I learned this the hard way years ago when I tried to whip up a batch right before a dinner party on a ridiculously hot July evening. The butter went from gorgeous and creamy to soupy separation sludge in about three minutes flat—it was a mess! Never again!
So, here are the few things I insist upon to get those perfectly smooth icing tips you’re looking for:
- Butter Temperature is Non-Negotiable: Remember: room temperature, not melted. If your butter is too soft, your frosting will be soft, and it won’t hold those sharp edges you want for decorating.
- Sifting is Essential: Don’t skip sifting the powdered sugar! Those tiny lumps cause texture issues, and we want silky smooth only.
- The White Secret: If you are aiming for a pure, crystalline white frosting for a wedding cake or something similar, swap out your standard vanilla extract for clear vanilla extract. It has a lighter color profile, though, of course, it won’t have that deep, rich flavor profile from using browned butter, which you can try in our chocolate chip cookie recipe!
- Rescue Operation: If, heaven forbid, your frosting gets too soft at room temperature, don’t panic. Just pop the whole bowl into the fridge for 15 minutes and then give it a quick 60-second whip again before using it.
Making Your Vanilla Buttercream Versatile: Ingredient Notes/Substitutions
One of the things I love most about a classic American vanilla buttercream is just how adaptable it is. Once you nail that base technique—creaming the butter right and whipping it long enough—you can change the entire profile by swapping out just one component. I always encourage home cooks to experiment once they have mastered the foundational steps, which is why I’m giving you the green light to play around with your liquids and flavorings.
If you’re making something that needs to be stark white, or perhaps you’re pairing this with a very dark cake, remember the tip about clear vanilla extract. While I cherish the deep notes of pure vanilla, clear vanilla gives you the same wonderful flavor punch without tinting your beautiful white base. It truly is a versatile recipe once you know these simple tricks!
Flavor variations are where things get really fun, too. You aren’t locked into just vanilla! If you’re topping a lemon cake, swap out the vanilla for 2 teaspoons of fresh lemon zest and a teaspoon of lemon extract. If you love peppermint in the winter, skip the vanilla and use 1 teaspoon of peppermint extract—that makes a fantastic cupcake topping recipe for holiday treats.
Also, let’s talk about milk versus cream. I usually list heavy cream because it makes the frosting marginally richer and slightly more stable, especially if you live somewhere hot. But if cream isn’t in the pantry, please don’t stop baking! Whole milk works perfectly well; you might just need that full 4 tablespoons to reach the exact consistency you’re looking for. My rule is always: trust your eyes and your spatula more than the exact measurement once you get to the liquid additions.
Storage and Reheating Instructions for Your Vanilla Buttercream
One last thing that makes this my go-to? It keeps beautifully! Because this is a classic American Buttercream, it’s quite sturdy when stored properly. You can leave this out on the counter—covered tightly, of course—for about two days if your kitchen isn’t too warm. For longer storage, wrap it super well and pop it in the fridge for up to a week. It freezes like a dream for up to three months, too!
The key to bringing back that gloriously creamy vanilla icing is simple: temperature control. If it’s been chilled, let it sit on the counter for about an hour until it feels pliable again. Then, you *must* give it a quick whip in the mixer for about 30 seconds. This reincorporates the air we beat in initially, ensuring you don’t lose that fluffy texture when you go to frost your treats!
Troubleshooting Common Issues with Easy Homemade Frosting
Even with the best vanilla buttercream recipe, sometimes things don’t look quite right during the mixing process. Don’t sweat it for one second! When you’re creating this no-fail vanilla frosting, you are dealing with ingredients that are highly sensitive to kitchen temperature and humidity. Based on my testing both professionally and at home, I’ve figured out the simple fixes for the two most common problems. Remember, almost everything in baking is fixable with a little patience.
If your frosting looks a bit sad or separates, it usually means your butter was either too warm when you started or the mixer ran too fast initially. If that happens, just pop the whole bowl into the fridge for 10 minutes to firm up the butter just a hair, then bring it back to the mixer and beat it again on medium speed. It usually comes right back together!
Here is how we tackle the texture adjustments you might need for your easy homemade frosting:
What If My Buttercream Is Too Soft or Soupy?
This usually happens on a hot day, or if your butter got a little too soft while you weren’t looking! If your vanilla buttercream looks like melted ice cream and won’t hold a peak after whipping, you have two quick options. First, the chill method: scrape it into a bowl, chill it for 15-20 minutes until it’s firm to the touch, and then re-whip it vigorously for about two minutes. This re-aerate the fat crystals that melted slightly.
If chilling just makes it too stiff, you can always add more powdered sugar. Be conservative here—add just a half-cup at a time while mixing on low, incorporating it fully before you decide you need more. Adding a tiny bit more sugar helps stabilize the fat content again. This trick always saves me when I need to frost one of my delicious chocolate cupcakes.
What If My Frosting Is Too Stiff or Crumbly?
This is the easier fix, I promise! If you’ve added all your sugar and the mixer is struggling to move, it means you just need a little more liquid to mobilize everything properly. Remember we listed 3 to 4 tablespoons of heavy cream? If you only used 3 and it’s too stiff, slowly add milk or cream, one teaspoon at a time, beating well after each addition. You don’t want to add too much, or you’ll swing right back into the ‘too soupy’ problem!
A common reason for crumble, especially after bringing refrigerated frosting back to room temperature, is often that the butter and sugar are reluctant to recombine. The solution here is usually just to beat it on medium-high speed for an extra three minutes. That final aggressive whipping incorporates the air needed to turn stiff clumps into that perfectly smooth icing we are aiming for.
Serving Suggestions: Pairing Your Bakery Style Buttercream
Now that you have this unbelievably reliable bakery style buttercream, the real fun begins! Since this recipe is so versatile and actually holds its shape when piped, it’s ready for whatever centerpiece you’re working on. My absolute favorite use is on my classic vanilla cake—it just tastes like a birthday celebration.
But don’t stop there! This vanilla buttercream is sturdy enough for piping intricate borders, which makes it my go-to for decorating everything from simple sheet cakes to celebration cupcakes. If you want something even quicker for a weeknight treat, this frosting is fantastic spread generously over my no-bake cookies for an indulgent finish. Honestly, if you can dream it up, this frosting can handle it!
It’s also the perfect pairing for something rich, like a deep, dark chocolate cake—the bright vanilla flavor cuts through the cocoa beautifully. If you’re looking for a template cake to try this icing on immediately, you must check out my chocolate cupcakes recipe; they look spectacular with a tall swirl of this fluffy vanilla topping.
Estimated Nutritional Data for Vanilla Buttercream
As a home cook who loves great food but isn’t obsessed with breaking down every macro, I always want to share an idea of what’s in the frosting we’re making. When you are whipping up this luscious vanilla buttercream, remember that these numbers are, of course, just estimates based on standard ingredient entries. Because we are using butter and sugar in generous amounts, we know this is definitely a treat!
I always approach this data with the understanding that food is meant to be enjoyed, not counted against. So, use this as a guide, but enjoy it without guilt—it’s worth every single spoonful!
Nutritional Snapshot (Estimated)
This breakdown is based on one serving size, which we calculated as about 1/4 cup of the finished frosting. Remember, if you spread it thicker on your cakes, the values will climb!
- Serving Size: 1/4 cup
- Calories: Approximately 350 per serving
- Total Fat: Around 18g
- Carbohydrates: About 48g
- Sugar Content: Roughly 45g (that’s where the sweetness comes from, naturally!)
It’s got a respectable amount of saturated fat due to the butter, but that fat is what makes this creamy vanilla icing so wonderfully smooth and stable for piping. Everything in moderation, right?
PrintUltimate Fluffy & Stable Vanilla American Buttercream Frosting

This recipe provides instructions for making a classic American vanilla buttercream that is rich, fluffy, and holds its shape well for piping and decorating cakes, cupcakes, and cookies.
- Prep Time: 10 min
- Cook Time: 0 min
- Total Time: 10 min
- Yield: About 3 cups 1x
- Category: Dessert Topping
- Method: Mixing
- Cuisine: American
- Diet: Vegetarian
Ingredients
- 1 cup unsalted butter, softened to room temperature
- 4 cups powdered sugar, sifted
- 1 tablespoon pure vanilla extract
- 3–4 tablespoons heavy cream or milk
- Pinch of salt
Instructions
- Place the softened butter into the bowl of a stand mixer fitted with the paddle attachment. Beat the butter on medium speed until it is completely smooth and creamy, about 2 minutes. Scrape down the sides of the bowl.
- Gradually add the sifted powdered sugar, one cup at a time, mixing on low speed until just combined after each addition.
- Add the vanilla extract and the pinch of salt. Increase the mixer speed to medium-high and beat for 3 minutes until the frosting is lightened in color and fluffy.
- Add the heavy cream or milk, one tablespoon at a time, beating well after each addition until you reach your desired consistency. If you need a stiffer frosting for piping designs, use less liquid. If you want a softer spreadable icing, use more liquid.
- Beat the buttercream on medium-high speed for an additional 3-5 minutes to incorporate air, which creates a smooth, bakery style buttercream texture.
- Use immediately to frost your favorite desserts.
Notes
- For the smoothest texture, ensure your butter is truly at room temperature, not melted.
- If the frosting seems too soft, chill it for 15 minutes before piping.
- To achieve a pure white color, substitute clear vanilla extract for the standard brown extract.
- If you are using salted butter, omit the added pinch of salt.
Nutrition
- Serving Size: 1/4 cup
- Calories: 350
- Sugar: 45g
- Sodium: 60mg
- Fat: 18g
- Saturated Fat: 11g
- Unsaturated Fat: 7g
- Trans Fat: 0.5g
- Carbohydrates: 48g
- Fiber: 0g
- Protein: 1g
- Cholesterol: 45mg